
Clean water is one of the most important—and often overlooked—essentials when travelling Australia by RV. Whether you’re topping up from a caravan park tap in Queensland or collecting bore water in the Outback, your onboard water system is your lifeline for drinking, cooking, showering, and hygiene on the road.
But over time, even treated water can leave behind sediment, bacteria, or biofilm inside your RV’s tanks, hoses, and plumbing. Left unchecked, this build-up can lead to foul odours, strange tastes, clogged filters, and even serious health risks. That’s why regular cleaning and maintenance of your RV’s water system is non-negotiable for safe, comfortable, and hassle-free travel.
In this guide, you’ll learn exactly how to clean, sanitize, and care for your freshwater, greywater, and (if installed) blackwater systems. We’ll cover step-by-step cleaning methods, recommended products, filter tips, hose care, and long-term maintenance strategies—all tailored for Australian conditions. Whether you’re a full-time vanlifer or a weekend traveller, this guide will help you keep your water system fresh, functional, and safe.
Table of Contents
ToggleOverview of a Typical RV Water System
To properly clean and maintain your RV’s water system, it’s essential to first understand how it works. Most Australian motorhomes, caravans, and campervans are equipped with three core water tanks—each serving a distinct purpose—and a network of hoses, filters, and pumps that keep water flowing through the system.
1. Freshwater Tank
This is your main water supply. It stores clean water collected from taps, rainwater, or other sources. Water from this tank is used for drinking, cooking, showering, and washing. The tank connects to a water pump and is often linked to your filtration system (if installed).
2. Grey Water Tank
The grey tank collects used water from your sinks and showers. While it doesn’t contain sewage, it may still carry food scraps, soap, or oils, making it prone to odours and bacterial growth. Grey tanks should be emptied regularly at designated dump points.
3. Black Water Tank (If Applicable)
Found in RVs with cassette or flush toilets, this tank holds human waste and toilet water. It requires careful dumping and regular treatment with chemicals or enzymes to break down waste and control smell.
4. Hot Water System
Many RVs include a gas or electric water heater that delivers warm water to your taps and showers. Some models also allow you to bypass this system when sanitizing to prevent damage.
5. Water Inlets and Outlets
Your system will include:
City Water Inlet: Connects directly to a pressurised tap at campgrounds (bypassing the freshwater tank).
Tank Fill Inlet: Where you fill your onboard freshwater tank.
Drain Outlets: For emptying each tank (usually marked clearly).
6. Pumps, Filters & Hoses
12V Water Pump: Moves water from your tank to taps when off-grid.
Inline & Under-sink Filters: Remove sediment, chlorine, or bacteria depending on the type.
Drinking Water Hoses: Food-grade hoses that connect to tap sources.
Drainage Hoses: Used for grey or black water discharge.
Understanding each part of your system helps you clean it thoroughly and troubleshoot issues before they become costly.
How Often Should You Clean Your RV Water System?
Just like your engine or tyres, your RV’s water system needs regular maintenance to stay clean, safe, and functional. But how often should you actually clean it? The answer depends on your travel style, where you source your water, and how long your RV sits unused between trips.
General Cleaning Frequency
Freshwater Tank: Every 1–2 months if in regular use, and before & after long storage periods
Drinking Water System (full sanitisation): Every 3–6 months, or after filling from questionable sources
Grey Water Tank: Monthly, or every 1–2 weeks during continuous travel
Black Water Tank: After every dump (chemical top-up) + deep clean monthly if used often
Water Filters: Replace every 3–6 months, or sooner if water flow reduces or taste changes
Key Factors That Influence Cleaning Schedule
Water Quality: If you’re filling up from bore water, rainwater, or untreated taps, you’ll need to clean and sanitize more often than if using town water.
Climate: Heat accelerates algae and bacteria growth. In warm or tropical areas, increase your cleaning frequency.
Trip Length & Usage: More water usage means faster build-up in tanks and filters—especially grey water.
RV Storage: If your RV sits unused for more than 2–4 weeks, clean the water tanks before and after storing to avoid biofilm or mould growth.
Signs Your System Needs Cleaning
Unpleasant odours coming from taps or drains
Cloudy or discoloured water when filling or pouring
Strange tastes, especially metallic or “plastic” notes
Reduced water pressure, which may indicate a blocked filter or algae growth
Visible slime or residue around tank openings or inside clear hoses
A good rule of thumb? If in doubt, clean it out. Preventative cleaning is always easier and safer than trying to fix contamination after it happens.
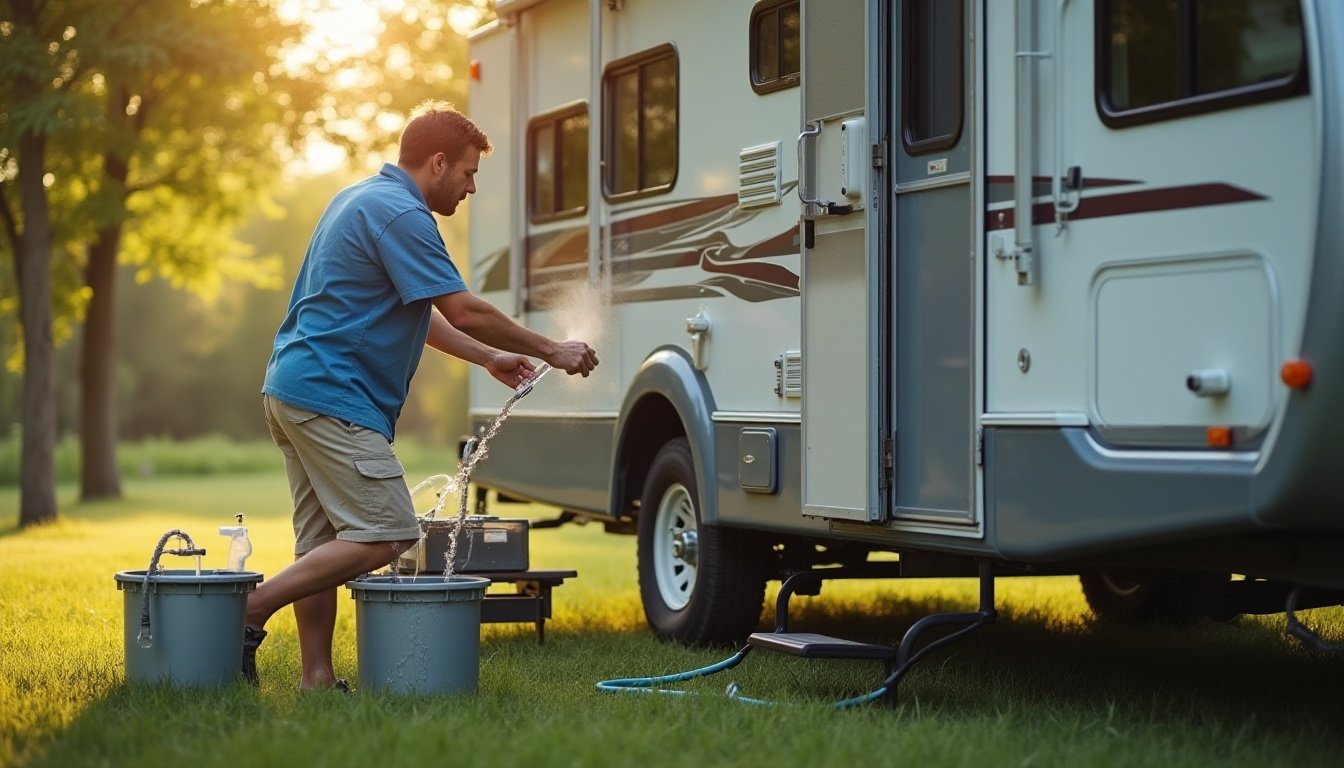
Step-by-Step: Cleaning Your Freshwater Tank
Your RV’s freshwater tank is the heart of your clean water system—and keeping it fresh is essential for health and hygiene. Over time, even safe water sources can leave behind biofilm, sediment, and bacteria. A regular deep clean helps prevent odours, slime, and waterborne illness.
Here’s how to clean it properly:
Step 1: Drain the Existing Water
Park on level ground and open the freshwater drain valve to empty the tank completely.
Open all taps, including the shower and outdoor spouts, to flush the lines.
If your system includes a hot water tank, bypass or drain it separately if needed.
Step 2: Prepare a Cleaning Solution
Use one of the following (per 100L of tank capacity):
Commercial RV tank cleaner (follow label instructions)
Bleach solution:
1/4 cup (60 mL) unscented household bleach per 100L of tank capacity
Mix bleach with a few litres of water first—never pour bleach directly into the tank
Alternative: Use white vinegar (1L per 100L tank) or bicarb soda + vinegar combo for a natural clean (less sanitising, more deodorising).
Step 3: Fill and Soak
Add your cleaning solution to the empty tank
Fill the tank completely with fresh water
Turn on the water pump and run water through every tap (cold and hot) until you smell the solution
Shut off taps and let the solution sit for 12–24 hours
This soak kills bacteria and loosens any internal build-up.
Step 4: Drain and Rinse Thoroughly
Empty the tank again via the drain valve
Refill with clean water and flush every tap until all smell and residue is gone
You may need to repeat the rinse cycle 2–3 times to remove bleach odour or taste
Tip: Add 1/2 cup baking soda per 100L during the final rinse to neutralise any bleach traces.
Step 5: Flush Filters (If Installed)
If your RV has inline or under-sink filters, remove them before flushing and replace or clean them afterward to avoid clogging or damage from bleach.
How to Sanitize Your RV Drinking Water System Safely
Cleaning your freshwater tank removes physical build-up and odours—but sanitizing kills bacteria, viruses, and biofilm throughout your pipes, taps, and pump system. This is a critical step, especially if:
You’ve filled up from an unknown or non-potable source
The RV has been in storage for more than 2 weeks
You notice strange tastes, odours, or visible contamination in your water
Here’s a safe and effective method to sanitize your RV’s drinking water system using diluted bleach, the most reliable and affordable option available across Australia.
Step-by-Step Sanitization with Bleach
What You’ll Need:
Unscented household bleach (standard 4%–6% sodium hypochlorite)
Measuring cup or jug
Clean bucket
Funnel
Potable (drinking-grade) hose
Step 1: Calculate the Correct Bleach Ratio
Use 1/4 cup (60 mL) of bleach per 100L of tank capacity. For example:
100L tank = 1/4 cup (60 mL) bleach
200L tank = 1/2 cup (120 mL) bleach
Never exceed this amount—stronger solutions can damage plumbing and seals.
Step 2: Add Bleach to the Tank
Dilute the bleach in a bucket of clean water
Pour the solution into the freshwater tank using a funnel
Fill the tank completely with fresh water after adding bleach
Step 3: Run Bleach Through All Water Lines
Turn on the pump
Open each cold tap, one at a time, until you smell chlorine
Repeat with hot taps to sanitize the water heater (if not bypassed)
Include showers and outside taps
Once all lines carry the solution, turn off the pump and let everything sit for at least 8 hours (overnight is ideal).
Step 4: Drain and Rinse
Drain the tank and open all taps to flush out the bleach
Refill the tank with clean water and flush again
Repeat until the chlorine smell is gone and the water tastes normal
Add a little baking soda to help neutralise remaining taste if needed
Optional: Alternative Sanitizing Methods
If you prefer a bleach-free approach, consider:
Hydrogen peroxide-based RV sanitisers (non-toxic, less odour, more expensive)
Commercial tank sanitizers like Camec’s Tank Clean or Bi-Carb Clean
UV filtration systems (for permanent purification, not cleaning)
Final Safety Tips
Do not drink water during or immediately after sanitising until fully flushed
Don’t reuse bleach mix from previous cleans—make it fresh every time
Always sanitise before first trip of the season or after water contamination
Caring for Grey and Black Water Tanks
While your freshwater tank needs to stay clean and safe for consumption, your grey and black water tanks need to be kept odour-free, unclogged, and hygienically emptied. Neglecting these tanks can quickly lead to nasty smells, bacterial growth, and plumbing issues—especially in the heat of the Australian outback.
Let’s explore how to maintain both systems properly.
Grey Water Tank Maintenance
Your grey water tank collects runoff from sinks and showers. Though it doesn’t contain human waste, it does carry:
Soap residue
Food scraps
Oils and grease
Hair and organic material
These can ferment and cause strong odours if left untreated.
How to Clean and Maintain Your Grey Tank:
Flush with hot soapy water once a week if travelling full-time
Add white vinegar or baking soda monthly to break down build-up
Use a biodegradable grey tank deodoriser (found at camping stores like BCF or Caravan RV Camping)
Install a grease trap in your kitchen sink if cooking often
Empty the tank at official dump points—never in nature or at rest areas
Tip: Leave a small amount of water in the tank after emptying and add a cup of vinegar to help keep it fresh between dumps.
Black Water Tank (Toilet Waste)
Only applicable if your RV is fitted with a cassette or flush toilet, the black water tank holds human waste and toilet paper. This tank requires more intensive care and specific chemical treatments.
Key Black Tank Care Tips:
Use RV-safe toilet chemicals (enzyme or formaldehyde-free options are best for the environment)
Empty the tank every 2–3 days or when 3/4 full—don’t let it overflow
After dumping, rinse the tank thoroughly with fresh water
Add a few litres of water and treatment chemical back into the tank to stop smells from forming
If you experience sensor misreads (e.g. always showing full), try a sensor cleaner or drop in a few ice cubes before driving to help dislodge buildup
Important: Always wear gloves and sanitise your hands after handling dump hoses or valves.
Both tanks are essential parts of your RV’s plumbing system. With regular maintenance and correct dumping, you’ll avoid foul smells, blockages, and the dreaded “grey water stench” that many RVers complain about.
Maintaining RV Water Filters and Hoses
Even with a clean tank and sanitized plumbing, your RV’s water quality depends heavily on filters and hoses. These often-overlooked components play a vital role in keeping contaminants out and preventing bacteria or mould buildup. Without proper care, even potable water from a clean tap can become compromised.
RV Water Filters: Types and Maintenance
Most RVs use inline water filters attached to the hose or under the sink to remove sediment, chlorine, heavy metals, or bacteria.
Common Filter Types:
Sediment Filters: Trap dirt, rust, sand—ideal for bore or outback water
Carbon Filters: Improve taste and remove chlorine
Inline Disposable Filters: Easy to install between hose and tank
Under-Sink Purifiers: Provide the cleanest drinking water—often with UV or carbon layers
When to Replace:
Every 3–6 months during frequent use
Immediately if water pressure drops or taste changes
After filling from muddy, discoloured, or untreated sources
Always follow manufacturer guidelines and mark your calendar to track replacement dates.
Keeping Your Hoses Clean and Safe
Your RV water hoses can harbour mould, bacteria, and slime—especially when stored wet or dragged through dirt.
Best Practices for Hose Hygiene:
Use only food-grade drinking water hoses (typically blue or white in Australia)
Label and separate hoses:
Blue for drinking water
Grey for waste or flushing
After use, drain hoses completely and coil them neatly
Store hoses in ventilated, dry areas, preferably in hose bags or tubs
Every month, flush hoses with a vinegar-water mix (1:4 ratio) to disinfect
Never allow your hose ends to touch the ground at fill stations, and always run water for 10 seconds before connecting to flush debris or insects.
Pressure Regulation and Backflow Prevention
High water pressure from town or park taps can damage RV plumbing.
Use a water pressure regulator (preset to 40–50 PSI) when hooking up to city water
Consider a non-return/backflow prevention valve to stop contaminated water from re-entering your clean lines
These small, inexpensive devices can prevent major leaks, burst pipes, and insurance nightmares.
Maintaining your filters and hoses is a quick task that pays off in better water quality, safer drinking, and fewer plumbing issues.
Tips for Safe Water Use on the Road
No matter how clean your RV’s water system is, your safety depends on how you source, store, and handle water during your trip. From bush camps to national parks and caravan parks, water quality can vary dramatically across Australia.
Here are some essential tips to help you keep your water safe and hygienic while travelling:
Always Assume Remote Water May Be Contaminated
In rural or remote areas, bore water, creek water, or rainwater may contain bacteria, heavy metals, or parasites.
Never drink untreated creek or dam water unless it’s been boiled, filtered, or chemically treated.
If unsure, use water for washing or flushing only, not consumption.
Boil, Filter, or Treat Non-Potable Water
Boil water for at least one minute before drinking or cooking
Use a portable water filter (like a Lifestraw or pump filter) for creek or tank water
Add water purification tablets (e.g. Aquatabs) as a backup for suspected contamination
Keep a gravity-fed water purifier (like a Berkey or Sawyer system) in your RV for off-grid use
Use the Right Containers and Hoses
Store water in BPA-free, food-grade containers
Only use dedicated drinking water hoses—never fill with garden or grey hoses
Clean containers and jerry cans with vinegar or mild bleach solution monthly
Let hoses and containers dry fully between uses to prevent mould growth
Take Water Safety Seriously at Caravan Parks
While most Australian caravan parks offer town water connections, not all taps are safe for drinking. Before filling your tank:
Ask staff whether the water is potable or non-potable
Flush taps for 10 seconds before connecting
Use an inline filter or fill via external filter jug if uncertain
Monitor Water Levels and Use Efficiently
Keep a water gauge or flow meter to avoid running out unexpectedly
Install low-flow taps and shower heads to extend water supply
Fill up at every opportunity in rural areas—never rely on a “next town” top-up
Carry a Water Test Kit
A portable water testing kit (like Aquasana, Simplex, or JNW) lets you quickly check for:
pH balance
Chlorine levels
Bacteria presence
Nitrate/nitrite contamination
Great for peace of mind when filling from questionable sources.
In short: treat every fill-up as a potential risk, and develop habits that keep your water clean and your body healthy. Safe water = safe travel.
Long-Term Water System Maintenance
If you travel long-term, live in your RV full-time, or store your vehicle between adventures, maintaining your water system is just as important as cleaning it. Over time, even trace amounts of residue, scale, or bacteria can affect your tank’s longevity, the taste of your water, and the reliability of your plumbing.
Here’s how to extend the life of your RV water system through regular maintenance and smart storage practices:
Deep Clean Every 3–6 Months
In addition to routine sanitising and flushing, do a comprehensive system clean at least twice a year:
Remove and soak filters or strainers
Descale the hot water system (especially in hard water areas)
Clean water lines with a tank cleaner or vinegar flush
Check all hose connections for leaks, wear, or build-up
This is especially important if you’ve travelled through remote areas or used bore or creek water.
Prevent Scale Build-Up in Hot Water Systems
Australia’s hard water can leave behind mineral scale, reducing efficiency and damaging heating elements.
Every 6–12 months, flush your hot water system using vinegar or descaling solution
Follow your hot water system’s manual (e.g. Truma, Suburban, Dometic) for safe cleaning
Avoid running empty tanks through the hot water system—it can burn out the element
Winterisation or Long-Term Storage Preparation
If you’re not using your RV for weeks or months:
Drain all tanks completely—fresh, grey, and black
Leave taps open and run pump briefly to clear lines
Remove filters and let them dry (or replace them after storage)
Use tank bungs or mesh screens to block insects and debris
Consider adding a small amount of RV antifreeze in cold regions (rare in Australia but necessary in alpine areas)
Moisture trapped in plumbing can lead to mould, corrosion, or pipe damage during storage.
Inspect Seals, Vents, and Caps
Every few months, do a quick inspection of:
Tank vent hoses: Ensure they’re free from dust or insect blockages
Inlet/outlet seals: Replace rubber washers if cracked or leaking
Screw-on caps and O-rings: Check for water-tightness
Pump operation: Listen for unusual noises or delayed flow
Catch small issues before they become major repairs on the road.
Regular long-term care ensures your RV water system stays reliable, hygienic, and efficient for years to come—whether you travel monthly or just once a season.
Summary Tips for RV Water Hygiene
Caring for your RV’s water system doesn’t need to be complicated—but it does require consistency. A clean, well-maintained water setup not only improves taste and comfort but also protects your health, your equipment, and your entire road trip experience.
Here’s a quick summary of essential hygiene and maintenance practices:
Clean your freshwater tank every 1–2 months, or before/after storage
Sanitize your entire water system every 3–6 months using diluted bleach
Flush grey water tanks regularly with hot soapy water or vinegar
Treat and rinse black water tanks after every dump to prevent odours and buildup
Use only food-grade hoses and keep them clean, dry, and separate by purpose
Replace water filters every 3–6 months, or sooner if flow or taste changes
Avoid drinking untreated water from creeks, dams, or unknown sources
Carry backup water purification tools like tablets or portable filters
Deep clean and inspect all components before and after long-term storage
Monitor tank levels and avoid running dry, especially when using a water heater
By building these simple habits into your routine, you’ll enjoy cleaner water, better system performance, and greater peace of mind while travelling across Australia—whether you’re off-grid in the bush or hooked up at a coastal caravan park.