
Before you hit the open road in Australia, a thorough RV maintenance check isn’t just recommended—it’s essential. With long distances between towns, rugged terrain, fluctuating climates, and limited roadside services in remote areas, even minor issues can turn into major problems fast.
Australia’s diverse landscapes—from the dusty Outback to humid coastal highways—can put a serious strain on your RV’s mechanical systems, tyres, water lines, and electrics. Whether you’re setting off for a weekend getaway or planning a multi-month road trip, conducting a detailed inspection ensures your RV is not only roadworthy but also safe, efficient, and comfortable for travel.
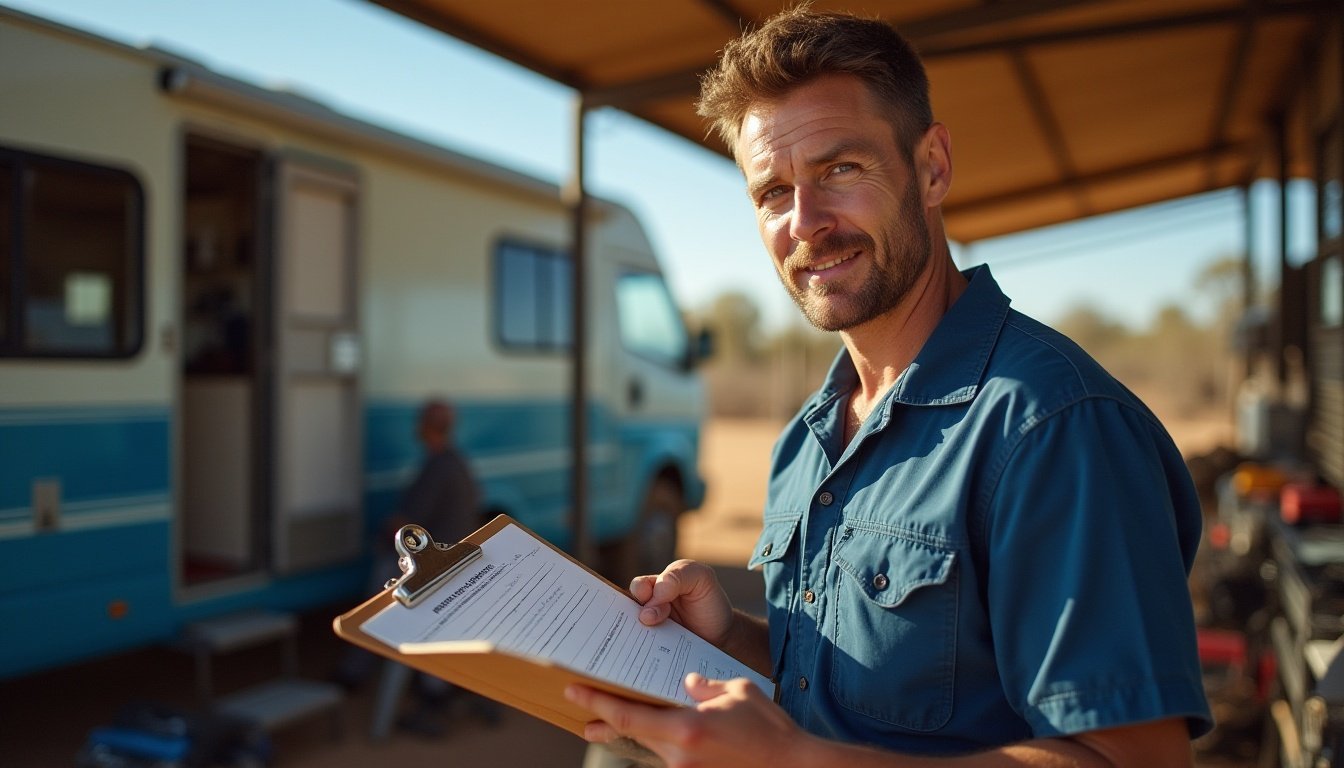
Regular maintenance not only prevents costly repairs but gives you peace of mind on the road—knowing your van, trailer, or motorhome is in peak condition. This guide walks you through a practical, Australian-specific checklist to help you prepare with confidence and avoid being stranded in the middle of nowhere.
Table of Contents
Toggle1. Pre-Trip Mechanical Inspection
Before you drive a single kilometre, your RV’s mechanical health needs to be checked thoroughly. Australia’s roads can be punishing—long stretches of highway, unsealed gravel roads, and steep climbs all demand a reliable engine and drivetrain. A mechanical failure in remote areas can leave you stranded for hours (or days) without access to help.
Engine Oil Level and Quality
Start by checking the engine oil dipstick. Oil should be between the minimum and maximum marks and a healthy amber colour—not black or gritty. If it’s dirty or hasn’t been changed in over 10,000 km (or the last 6–12 months), it’s time for a service.
Coolant and Radiator
Pop the radiator cap (only when cold) and check the coolant level and colour. Topped-up, clean coolant prevents overheating—especially important in Australia’s hotter regions. Inspect radiator hoses for cracks, bulging, or leaks.
Brake System and Fluids
Test the brake pedal for firmness and check the brake fluid reservoir. Low fluid may signal worn brake pads or a leak. If you’re unsure, have a mechanic inspect the pads, rotors, and hydraulic lines.
Battery Health
Test your vehicle battery with a multimeter—it should read between 12.4V and 12.7V when resting. Check for corrosion on terminals, and ensure the battery is securely fastened. If your battery is over 3 years old, consider a test or replacement.
Belts, Hoses, and Filters
Inspect drive belts for cracks or fraying, and ensure they have proper tension. Check all engine hoses for leaks or swelling. Don’t forget the air filter—it should be clean, especially if you’ve travelled dusty roads.
If you’re mechanically confident, do these checks yourself. Otherwise, book a pre-trip service with a trusted mechanic who understands RVs or diesel systems.
2. Tyres and Suspension
Your tyres and suspension system are your direct connection to the road—so neglecting them is a recipe for breakdowns, blowouts, or even accidents. Given Australia’s mix of sealed highways, rough gravel roads, and corrugated Outback tracks, they take a beating over time.
Tyre Pressure (Cold) and Tread Wear
Check tyre pressure when tyres are cold, using a quality gauge. Refer to your vehicle’s placard (usually inside the driver door) for recommended PSI. Under-inflated tyres increase fuel consumption and wear; over-inflated ones reduce grip.
Inspect tread depth—it should be at least 3 mm across the entire tyre. Uneven wear may indicate alignment or suspension issues.
Spare Tyre Condition
Don’t forget your spare! Make sure it’s inflated, undamaged, and easily accessible. Many travellers only discover a flat or missing spare in an emergency—don’t let that be you.
Wheel Alignment and Rotation
If your RV pulls to one side, or your steering feels loose or wobbly, it may need a wheel alignment. Tyres should also be rotated regularly (every 10,000 km) to ensure even wear—especially on long-distance trips.
Shock Absorbers and Suspension Wear
Listen for knocking sounds or a bouncy ride, both signs of worn shocks. Look underneath for signs of fluid leaks, cracked bushes, or sagging springs. Off-road or heavily loaded vans are especially prone to suspension wear.
If you’re towing, also inspect the suspension on your caravan or trailer—springs, shackles, and U-bolts should be secure and rust-free.
3. Electrical System Check
A reliable electrical system is crucial for both safety and comfort on the road. From starting your vehicle to powering your lights, fridge, water pump, and phone chargers, your RV’s 12V and 240V systems need to be in top shape before any long-distance journey.
Headlights, Indicators, and Brake Lights
Walk around your RV and test all exterior lights:
Headlights (high and low beam)
Tail lights
Indicators (front, rear, and side)
Brake lights
Reverse lights
Replace any blown bulbs immediately and carry spares—especially for remote travel where replacements aren’t always available.
Interior Lights and Fuse Panel
Check that all interior cabin and appliance lights work, including reading lights, rangehood lights, and bathroom LEDs. Locate your fuse panel and test for any blown fuses or loose wires—label everything for future reference.
Inverter and Auxiliary Power
If you run a 240V inverter, test it under load—plug in a laptop or kettle and see how it performs. Ensure that:
It’s properly wired to your house battery
It doesn’t overheat
The ventilation fan functions
Also check your 12V sockets and USB ports—essential for running fridges, fans, or charging phones.
Battery Charge (House and Starter)
Use a multimeter or battery monitor to check both the starter battery and house (deep cycle or lithium) battery. Ideally:
Starter battery: 12.4–12.7V at rest
House battery: above 12.0V (depending on charge level and type)
Charge with solar, mains, or vehicle alternator before departure.
Solar Panel Output (If Installed)
Wipe down solar panels to remove dust and grime—they lose efficiency quickly when dirty. Use your solar regulator or monitor to check:
Charge voltage
Amperage input
System status
If your system isn’t charging efficiently, check cable connections and test under full sun for performance.
4. Water and Plumbing System
Water is essential for hygiene, cooking, drinking, and cleaning while travelling—especially in Australia’s remote regions where supply can be unpredictable. A functioning RV plumbing system ensures you’re not left without basic comforts when far from facilities.
Freshwater Tank and Hoses
Start by flushing and refilling your freshwater tank. If the tank has been sitting unused, sanitise it with a mild bleach solution or specialised tank cleaner. Check:
Fill point and cap seal
Tank straps or brackets for cracks or corrosion
Hoses for leaks, mould, or foul odour
Bring food-grade hoses for refilling at caravan parks or public water points. Avoid using general-purpose garden hoses for drinking water.
Water Pump Operation
Switch on the water pump and listen for steady, smooth operation. If it pulses or fails to shut off, check for airlocks, leaks, or debris in the filter. Clean or replace the filter if needed.
Ensure taps, shower heads, and toilets are all functioning and have no leaks.
Grey and Black Water Tanks
Grey water (sinks, showers) should drain freely without blockages.
Black water (toilet waste) must be sealed tightly and odour-free.
Test both tank valves and seals. Make sure your dump hoses are intact and clean. Carry appropriate chemicals or additives to manage smell and bacteria build-up.
In Australia, free camping areas often require a self-contained setup—so functioning grey/black systems are a must.
Check for Leaks and Connections
Inspect all joints, elbows, and tap fittings under sinks and behind walls. Water damage can go unnoticed in RVs until it’s extensive. Run each tap and watch for drips or pressure drops.
Water Filter Condition
If you have a drinking water filter installed (carbon or ceramic), clean or replace it as per the manufacturer’s instructions. It’s especially important when refilling from unfamiliar or outback sources.
5. Gas and Cooking Appliances
Your gas system powers essential amenities like cooking, refrigeration, and sometimes heating—so it must be tested and safe before every major trip. In Australia, gas-related accidents are rare but can be serious, especially in confined spaces like RVs.
Check Gas Bottle Levels and Connections
Start by checking your LPG bottle levels. Use a scale, hot water trick (pour warm water down the side and feel where the bottle goes cold), or a gas level indicator.
Inspect:
Gas lines for cracks or wear
Regulator for corrosion or damage
Connection points for tightness (use spanner, not bare hands)
Replace perished O-rings or cracked hoses before hitting the road.
Test for Gas Leaks
Use a spray bottle with soapy water and spritz the connections. If you see bubbles forming, you have a leak—tighten fittings or replace damaged parts immediately.
Never use a naked flame to test for leaks. Always turn off bottles before sleeping or driving.
Test Burners, Stove, and BBQ
Light your stove and burners one by one. Ensure:
Flame is steady (blue, not yellow or flickering)
Ignition is working correctly
No gas smell lingers after turning off
If you use a slide-out BBQ, check hoses, fittings, and slide mechanism. Also inspect storage for heat damage or soot build-up.
Fridge Power Functionality
Many RV fridges can run on gas, 12V, or 240V. Test all three settings:
Does it cool down properly on gas?
Is there airflow and exhaust when venting outside?
Is the flame consistent?
If gas mode isn’t working, it could be a clogged jet or flue, which may require a professional clean.
6. Interior and Safety Equipment
Your RV’s interior is not just about comfort—it also plays a big role in keeping you safe during travel. Before heading out on a long trip, ensure your living space is secure, hazard-free, and equipped with essential emergency gear.
Secure Loose Items and Storage
Loose items can become dangerous projectiles when braking suddenly or hitting rough roads. Check:
Overhead cupboards—ensure latches click firmly shut
Fridge contents—use anti-slip mats and containers
Kitchenware—secure pots, pans, and utensils
Bins and drawers—lock or velcro shut
Also inspect fold-out tables, slide-outs, and internal steps for stability.
Smoke and Carbon Monoxide Detectors
Test all smoke alarms by pressing the test button. Replace batteries if needed. If your RV has gas appliances, install a carbon monoxide detector—especially if sleeping inside while using gas heating or fridge.
These alarms are lifesavers in enclosed spaces and are mandatory in many RV parks.
Fire Extinguisher and Fire Blanket
Every RV should have a dry chemical fire extinguisher mounted within easy reach (usually near the kitchen or door). Check:
Pressure gauge is in the green zone
Expiry date (replace every 5–10 years)
Mounting bracket is secure
Also carry a fire blanket for small kitchen fires—store it near the cooking area.
First Aid Kit
Inspect your first aid kit and replenish:
Antiseptics, bandages, gauze, tweezers
Pain relief, antihistamines, burn gel
Snake bite bandage and saline
Updated emergency contacts and CPR guide
Store it in an accessible location and let all passengers know where it is.
Fans, Windows, and Ventilation
Check that roof hatches, fans, and windows open/close properly. Proper airflow is crucial for comfort, but also for safety when cooking or using gas. Clean dust filters and lubricate hinges if needed.
Well-ventilated RVs also reduce condensation and mould buildup—common issues in Australia’s humid coastal areas.
7. Exterior RV Body and Attachments
While it’s easy to focus on what’s inside your RV, the exterior is just as important—especially when tackling Australia’s rugged terrain, high winds, and unpredictable weather. A thorough check of your RV’s outer shell, roof, and attachments can help prevent leaks, rattles, or roadside failures.
Inspect Roof Seals, Windows, and Doors
Carefully inspect:
Roof joins and skylights for cracks or degraded sealant
Window seals for leaks or gaps (especially if you’ve parked in sun for long periods)
Door hinges and latches—ensure they shut tightly and don’t rattle while driving
Even a small leak can cause major water damage over time, so reapply sealant or book a professional inspection if needed.
Awning Functionality and Security
Roll out your awning fully and check:
Fabric for tears, mildew, or UV damage
Arms for rust, stiffness, or damage
Locks and tension systems for smooth operation
Practice rolling it back up securely. Never drive with it extended, and always tie it down in windy conditions—awnings are one of the most common insurance claims from RVers.
Steps, Jacks, and Stabilisers
Check that:
Entry steps fold and unfold smoothly
Manual or electric jacks are rust-free and functioning
Stabiliser legs are not bent, missing pins, or seizing up
Apply lubricant to moving parts and clean off road grime or sand that can interfere with function.
Solar Panels, Antennas, and Roof Fixtures
Clean solar panels with a soft cloth and water—dirt and dust reduce efficiency
Tighten mounts for antennas, racks, or satellite dishes
Ensure all cables are secure and protected from sun and weather
Inspect roof-mounted gear after storms, corrugated roads, or tree-heavy campsites—vibration and low-hanging branches can easily cause damage.
8. Towing System and Hitch (for Caravans or Trailers)
If you’re towing a caravan, trailer, or camper, your hitch system is one of the most critical safety components to inspect before departure. A failure here could result in major accidents, loss of control, or damage to both vehicles—especially on Australia’s winding or uneven roads.
Coupling and Tow Ball Condition
Start by examining your tow ball and coupling:
Look for rust, cracks, or wear on the tow ball
Ensure the coupling mechanism clicks securely into place
Use a locking pin or hitch lock for safety and theft prevention
Grease the tow ball if required, especially if your system uses a standard ball coupling.
Safety Chains and Breakaway Cable
Check that your safety chains are the correct weight rating and attached with rated D-shackles or hooks. Make sure they’re not dragging on the ground, tangled, or rusted.
The breakaway cable, which activates your trailer’s brakes if it disconnects, should be in good condition and attached to your vehicle—not to the chains.
Trailer Plug and Lights
Connect your trailer plug and test:
Tail lights
Brake lights
Indicators (both sides)
Reverse lights
Corrosion inside plugs or sockets is common, especially near the coast—clean contacts and use dielectric grease if needed.
Brake Controller Functionality
If your caravan has electric brakes, test your in-vehicle brake controller:
Apply brakes gently while driving and feel for trailer response
Adjust gain settings according to load and road conditions
Check the controller display for error messages or wiring faults
If using hydraulic or mechanical override brakes, inspect linkages and pads for wear or tension.
Weight Distribution System
If you use a Weight Distribution Hitch (WDH), inspect all spring bars, chains, and mounts. Make sure:
Tension is even on both sides
There are no missing clips, cracks, or bent components
The setup is adjusted to level your RV and tow vehicle
Also check the Gross Vehicle Mass (GVM) and tow ball weight to ensure you’re within legal and safe towing limits.
9. Cleaning, Stocking, and Organising
Before any big RV trip across Australia, a thorough clean and smart organisation routine can make your journey smoother, safer, and far more enjoyable. From better hygiene to improved efficiency on the road, this often-overlooked step is well worth your time.
Deep Clean Inside and Out
Start with a full interior clean:
Wipe down benches, shelves, and appliances
Clean floors, windows, and ceiling fans
Empty and sanitise the fridge and pantry
Disinfect high-touch areas: handles, switches, steering wheel
On the exterior, wash the RV body, undercarriage, and roof to remove dust, salt, or debris that could cause rust or damage solar panels and seals. Cleaning also helps you spot cracks, leaks, or loose fittings before they become major problems.
Stock Up on Essentials
Create a pre-departure restock list, including:
Food staples (rice, oats, tinned goods, snacks)
Drinking water (20+ litres minimum in remote areas)
Cleaning products (dish soap, wipes, sanitiser)
Gas bottles, toilet chemicals, and dump gloves
RV-specific tools (tyre inflator, levelling ramps, fuses)
Also check your inventory of toiletries, laundry supplies, pet food (if applicable), and cooking fuel.
Refuel and Top Up Key Tanks
Fuel: Fill up your diesel or petrol tank before heading into remote zones where service stations are rare.
Water: Refill your freshwater tank and jerry cans.
LPG: Check gas bottle levels and top up if low.
Always fill up in major towns before heading inland or to less populated coastal routes.
Recheck Your Paperwork
Confirm your:
Vehicle registration and insurance are valid
Roadside assistance is active (NRMA, RACV, etc.)
Towing and weight certificates (if relevant)
Printed backup of maps, campground bookings, and licenses
Keep digital copies on your phone or cloud service like Google Drive or Dropbox, in case of emergency or poor signal.
10. Test Drive and Final Checks
Before setting off on a long-haul journey, a short test drive and final inspection can help you catch small issues that could become big problems on the road. Think of it as your last safety net—many RV mishaps happen within the first few hours due to overlooked steps or assumptions.
Take a Short Local Test Drive
Choose a quiet loop near home or the service centre:
Test brakes for responsiveness and unusual sounds
Accelerate and decelerate slowly to feel for vibrations
Check how the RV or caravan handles turns and bumps
If towing, listen for creaking or clunking from the hitch
This will help confirm your mechanical, suspension, and brake systems are working together properly.
Listen for Unusual Noises
Turn off your radio and drive with the windows down. Listen for:
Whistling (roof leaks or windows not sealed)
Rattling (loose interior fittings or storage)
Grinding or scraping (brakes, wheels, or suspension)
Investigate anything unfamiliar—don’t assume it’ll “go away.”
Walk-Around Visual Inspection
Park on a level surface and do a full lap around your RV:
Confirm all windows, vents, and doors are locked
Check awning is retracted and secured
Ensure external connections (power, water, gas) are disconnected
Verify tyre pressures visually
Look underneath for any fluid leaks or dangling cables
Also ensure that stabilisers and jacks are retracted fully before moving.
Adjust Mirrors and Visibility Aids
Set your:
Rear-view and side mirrors for towing visibility
Rear camera or reversing sensors (if installed)
Dash-mounted GPS or mobile navigation system
If you’re towing a caravan or large trailer, consider towing mirrors—they’re legally required in many Australian states.
Once these checks are complete, you can hit the road with peace of mind—knowing you’ve covered every key safety and performance detail.
Conclusion: Drive with Confidence, Not Guesswork
When it comes to RV travel in Australia, preparation is everything. A well-maintained vehicle isn’t just about comfort—it’s about safety, reliability, and freedom to explore even the most remote corners of the country without unnecessary worry.
By following this detailed RV maintenance checklist before hitting the road, you drastically reduce the risk of breakdowns, accidents, or costly emergency repairs. More importantly, you protect your time, your investment, and the experience you set out to enjoy.
From your engine to your awning, your tyres to your fridge, and your gas lines to your solar panels—every system matters when your RV is both your home and your mode of transport.
Don’t wait for something to go wrong in the middle of the Outback or far from a mechanic. Take the time to check, test, clean, and prepare. Your future self—cruising confidently under the Aussie sun—will thank you for it.